Test Your Soil to Grow More Vigorous Plants
Soil testing is a good way to assess the health of your soil and make any necessary improvements to soil fertility for more productive plants. Soil testing provides a snapshot of your soil’s current nutritional and material composition.
A big factor in your test will be the pH (acidity/alkalinity) level of your soil, which affects whether or not nutrients already present in your soil are available to your plants. Search the web for “soil pH and nutrient availability” images, which illustrate how pH corrections can improve what your plants access.

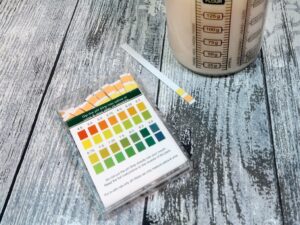
There are basic self-test kits available in garden centers and home improvement stores that can be helpful in measuring pH and for identifying nitrogen, phosphorous or potassium (NPK) deficiencies. Or, you can submit a sample to an independent laboratory for a more detailed report that can including other micro- and macronutrients, as well as cation exchange capacity (CEC), organic matter content, and soil structure. Here are the basic soil sampling steps to get your soil analyzed.
Collect a representative sample
From the area you wish to sample, like a planter bed, vegetable garden, lawn, or even a single pot, create a composite sample of the area’s soil. Use a professional soil probe or dig down 6-8 inches into the root zone to collect several small soil samples. Deeper samples are useful for measuring salt buildup. Collect the samples when the soil is the driest and mix them together. Then, per your specific lab’s instructions, use a clean, dry bag or container to package up the consolidated sample, minus any plant roots or rocks.

Submit your consolidated sample for analysis
There are many choices for soil testing: home test kits from garden centers, test-by-mail services, cooperative extension services, or independent laboratories, which cater to agronomy industry professionals and whose reports can seem highly technical.
The lab you choose will give you specific instructions for submitting your sample for analysis. Follow the instructions carefully to ensure the accuracy of your results.

Understand your results
For many homeowners, this is sometimes the most intimidating step in the soil testing process. For most self-test kits, a color chart will help you read whether your pH and NPK levels are over, under or within range. Mail-order services generally include results together with written reports that help to explain the nutrient levels and advice for why and how to correct. Testing laboratories catering to industry often test for a broader range of micro- and macronutrients, but the reports may list numeric results with little interpretation. A good beginners’ resource for understanding soil test results is at https://extension.psu.edu/soil-test-results-whats-next-guide-for-homeowners.
Amend your soil
There are so many possible variations for what your soil remediation may involve that we cannot cover them here. Still, no matter your soil test results, adding organic matter to your soil is the best remedy for poor soil. The process may take several years to improve your soil, so start now by adding compost or top-layering with various organic matter like mulch, manure, grass clippings and leaf debris to decompose into your soil. You can even start making your own compost from kitchen peelings and plant debris. A good sign your soil is improving is an increase in earthworms and beneficial funghi, microbes and nematodes.
For immediate corrections to macronutrient NPK deficiencies, look to common fertilizers to correct for the levels you need. You will find the amendments you need at local garden centers. Follow package instructions carefully for proportions and mixing.
For more information on soil sampling and links to soil and water testing laboratories in Arizona, refer to the University of Arizona Cooperative Extension document at https://extension.arizona.edu/pubs/soil-sampling-analysis.
Reach us at contactus@evergreenaz.com to request a custom bid for your commercial landscape.


