How To Properly Dig a Planting Hole
How To Properly Dig a Hole for Planting
It’s an understatement to say that one of the most important aspects of a landscape plant’s long-term health is the strategy with which it is initially installed. The manner in which the initial planting hole is dug is vital to this process, along with how that hole is filled in once the plant is in the ground.
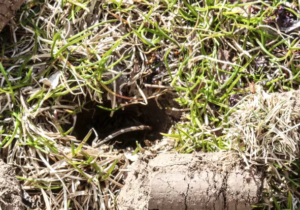
The soil in the Phoenix area is highly alkaline and made mostly of clay, making the dimensions of the initial planting hole particularly important. For most plants, especially desert-adapted shrubs, trees, and cacti, it’s important that the planting hole is NO DEEPER than the initial container they came in. In fact, accounting for soil settling and crumbling in the pot, the hole could even be a bit shallower than the container the plant came in.
In these clay soils, width is extremely important to assisting the circulation and root growth of the plant. Typically, it is recommended that the hole be at least TWICE AS WIDE as the diameter of the container the plant came in. Most roots in desert-adapted plants grow much more horizontally than vertically, as that’s where the most water and air will be.
Once the hole is dug, it’s time to install the plant. Once it’s out of its container, it’s often a good idea to gently unravel any roots that are tightly bound. If the roots toward the bottom of the pot are so tightly wrapped up that they could make a basket, you can often pull the matted mess off the bottom. Be warned though, doing this may increase the plant’s initial shock damage. In the long run, it should be better for the plant’s longevity.
While many people like to add fresh compost or other soil to a planting hole, this is actually usually unnecessary, and can even worsen the plant’s chances of survival in the long term. It’s best to fill in the hole with the same soil that was dug out. This increases the likelihood that the plant will adapt to its surroundings quickly. When the hole is filled in, DON’T STOMP IT FLAT! It’s best to water the hole in so the air pockets in the soil are allowed to remain and gradually set naturally while the plant begins to grow new roots. Stomping down the soil can choke the plant’s roots of water and air and give it a disadvantage from the start. If you’re worried about erosion early on, it’s better to use rocks or gravel.
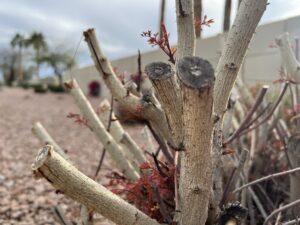
You should be able to clearly see the Root Flare of any plant that is freshly planted. The root flare is the plant’s transition from stalk to root. If all you see is a stalk or trunk going straight into the ground with no visible root flare, the plant is too deep in the ground. Sometimes, a plant may even be buried too deep in its container at a nursery, so be sure to clear out any soil that covers the root flare, even if it’s soil from the original container.
If you followed all these steps correctly, your plant should be off to a good start for its life in your yard!
At ELS Maintenance & Construction, we install plants using the best practices for each species in Arizona landscaping. If you know of a community or commercial center that needs new landscapers, email contactus@evergreenaz.com and we can get started!
Text content